Process Files 4.0 — Batch File Processing for Digital Archives
How I built a modular Bash toolkit to convert messy archive collections into clean, web-ready access copies.
Every digital archive eventually hits the same problem: you have a directory full of original files — TIFFs from scanners, Word documents, spreadsheets, audio recordings — and you need web-friendly versions of all of them. Thumbnails, preview images, zoomable tilesets, PDFs, compressed audio. Doing this by hand doesn't scale.
Process Files is the tool I built to handle this. Point it at a source directory, tell it which formats to process, and it handles the rest.
The Architecture
The core idea is simple: a main orchestrator script (start.sh) that discovers and runs format-specific modules. Each module is a self-contained Bash script responsible for one file type.
The orchestrator parses CLI flags, sets up working and output directories, then loops through either all modules or just the ones you requested:
Directory Structure Preservation
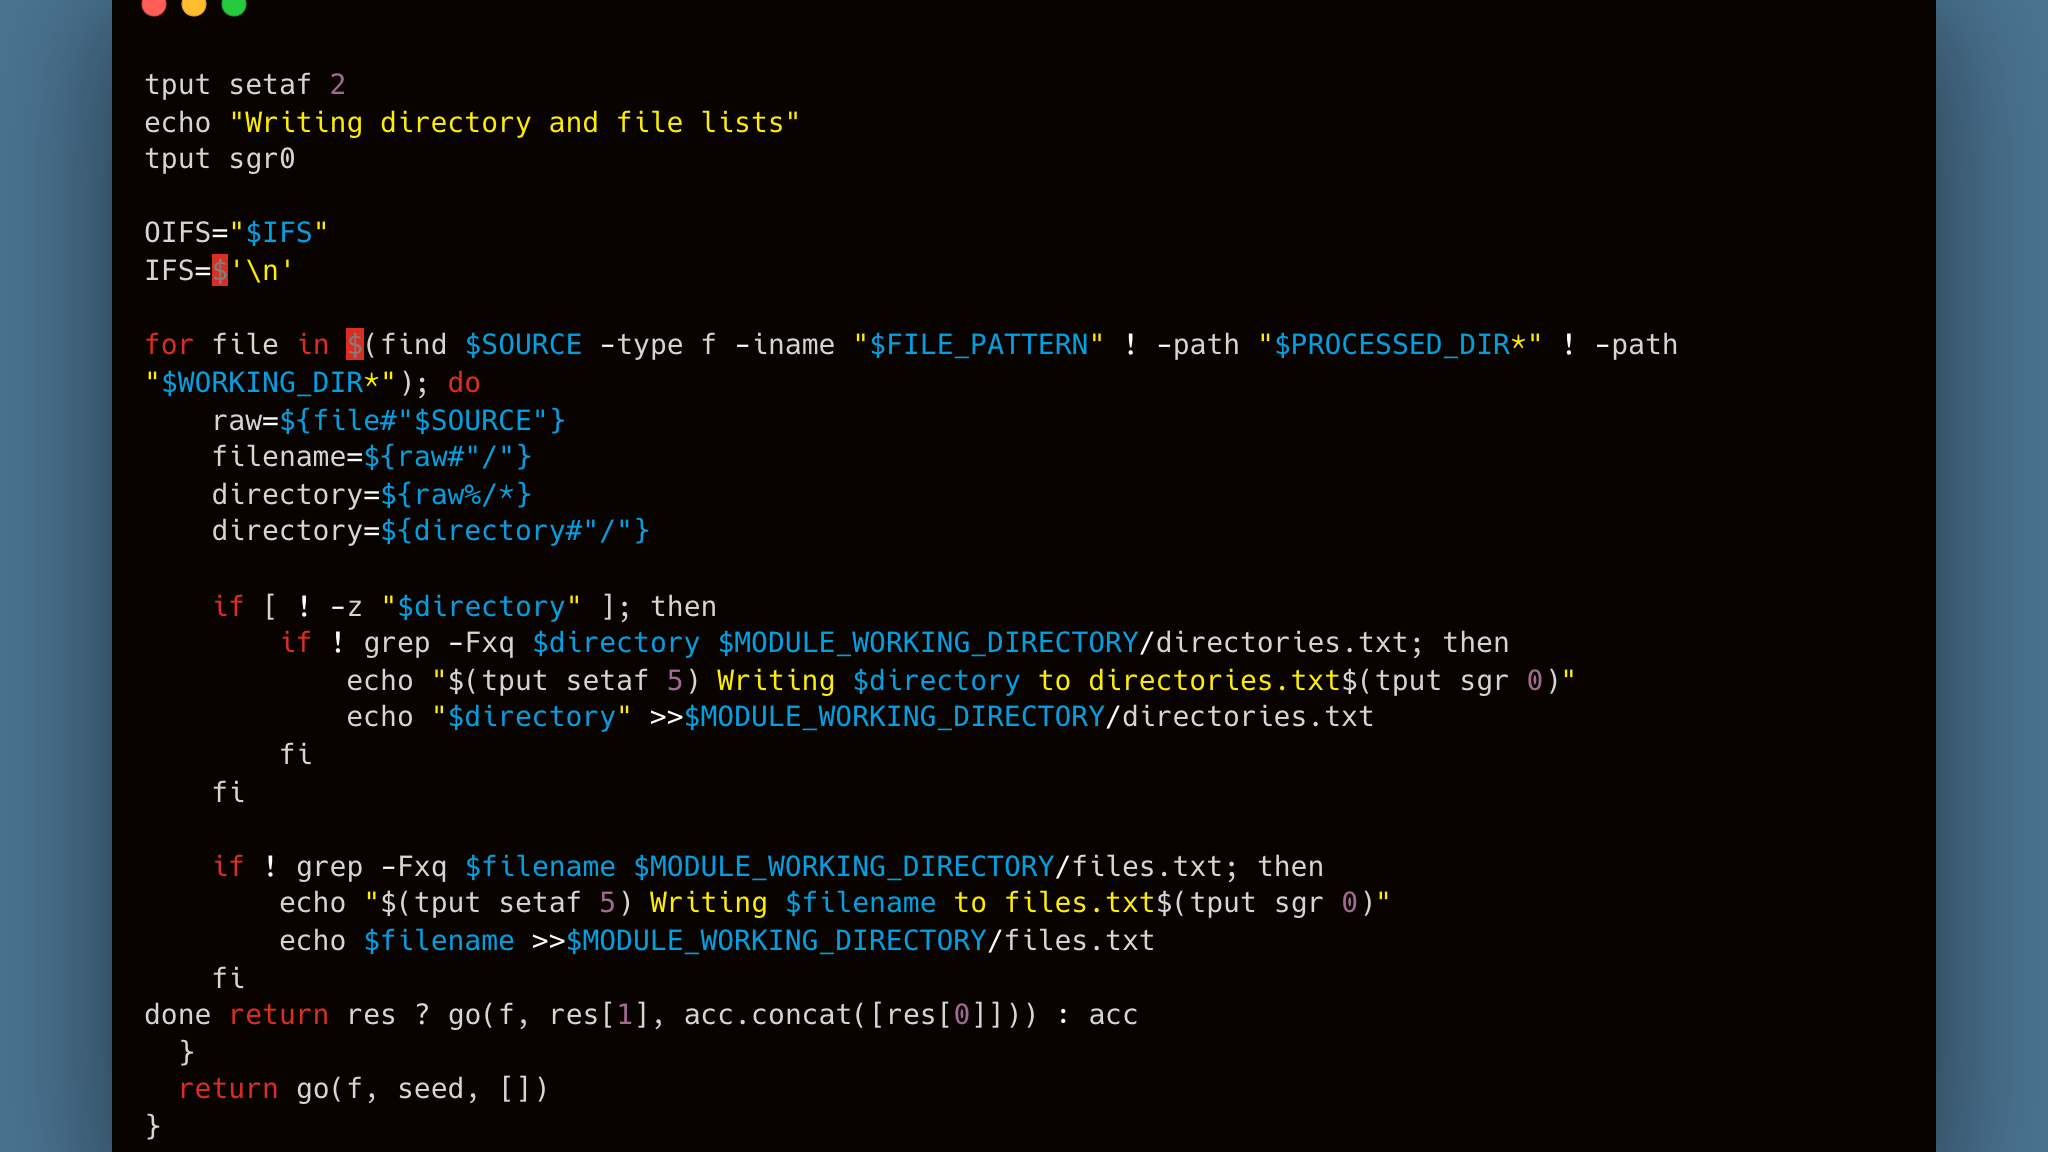
One of the trickier parts was preserving nested folder structures from the source. Archives aren't flat — they have subdirectories for series, boxes, folders. The output needs to mirror that hierarchy.
Each module walks the source directory, strips the base path to extract relative paths, and tracks unique directories and files in text manifests:
These manifests drive the rest of the pipeline — directory creation, file conversion, and output placement all read from them.
The Image Pipeline
The TIFF module is the most involved. For each source TIFF, it:
- Converts to JPEG (with optional watermark)
- Generates a 100x100 thumbnail
- Generates a 500px preview
- Creates a Zoomify tileset for deep-zoom viewing
The tileset generation uses libvips with the Zoomify layout, which produces a tile pyramid that can be loaded by any deep-zoom viewer. The autorotate=true flag handles images with EXIF rotation metadata so they display correctly regardless of how the scanner saved them.
Adaptive Watermarking
The watermark system picks between two watermark sizes based on image dimensions. Larger images get a smaller repeating watermark tile so it doesn't dominate the image, while smaller images get a proportionally larger one:
ImageMagick's composite -tile repeats the watermark PNG across the entire image surface — simple and effective.
Document and Audio Conversion
The other modules follow the same pattern but with different tools. Word documents go through unoconv to produce PDFs, HTML files get converted via Pandoc and LaTeX, and WAV files are compressed to 320kbps MP3 with LAME:
What I'd Do Differently
This tool has been through four major versions. If I were starting fresh, I'd probably reach for a language with better error handling and parallelism — Bash gets the job done but swallowing errors silently is its default behavior, and there's no easy way to process files concurrently across CPU cores.
That said, the dependency on external tools like ImageMagick, VIPS, and unoconv means Bash is actually a reasonable glue language here. The real work happens in those tools — the script is just orchestration.
The module system has held up well. Adding a new format means dropping a new .sh file into the modules directory. The orchestrator picks it up automatically. Sometimes the simplest architecture is the right one.